


Ever worried about connection failures in Steam Remote Play or Parsec, etc., when partying with your friends? Or ever somehow having troubles establishing SSR tunnel connections under abysmal network conditions to overseas servers? A self-hosted home Wireguard node might just be the solution.
Wireguard is a open-source software and a communication protocol that transmits data traffic in UDP tunnels, aiming to provide faster and more stable connections than IPsec and OpenVPN. It's asymmetric encryption process entails implementations of miscellaneous cryptography protocols, including Noise protocol framework, Curve25519, ChaCha20, Poly1305, BLAKE2, SipHash24, HKDF, etc..

Deployment
Dependencies
Make sure you have the following plugins installed on your OpenWRT:
wireguard-toolskmod-wireguardluci-app-wireguardluci-proto-wireguard
Run the following command to install if needed:
opkg update
opkg install luci-proto-wireguard
opkg install luci-app-wireguard
opkg install kmod-wireguard
opkg install wireguard-tools
reboot
Generate Keys & Luci Configuration
Note that Wireguard uses an asymmetric encryption method (plus an optional symmtric key addon), so public keys, private keys and pre-shared keys need to be set up for each node (the "server" side is also a node).
Keys for the Server Side
Create Directory
mkdir wireguard #Create a folder for the node
cd wireguard
Generate Keys
umask 077 #Set permission level
wg genkey | tee sprivatekey | wg pubkey > spublickey #Generate keys, "sprivatekey" stands for server-privatekey and "spublickey" means the counterpart
cat sprivatekey #Check and save the keys for later use
cat spublickey
Luci Settings
WireGuard VPN Configurations
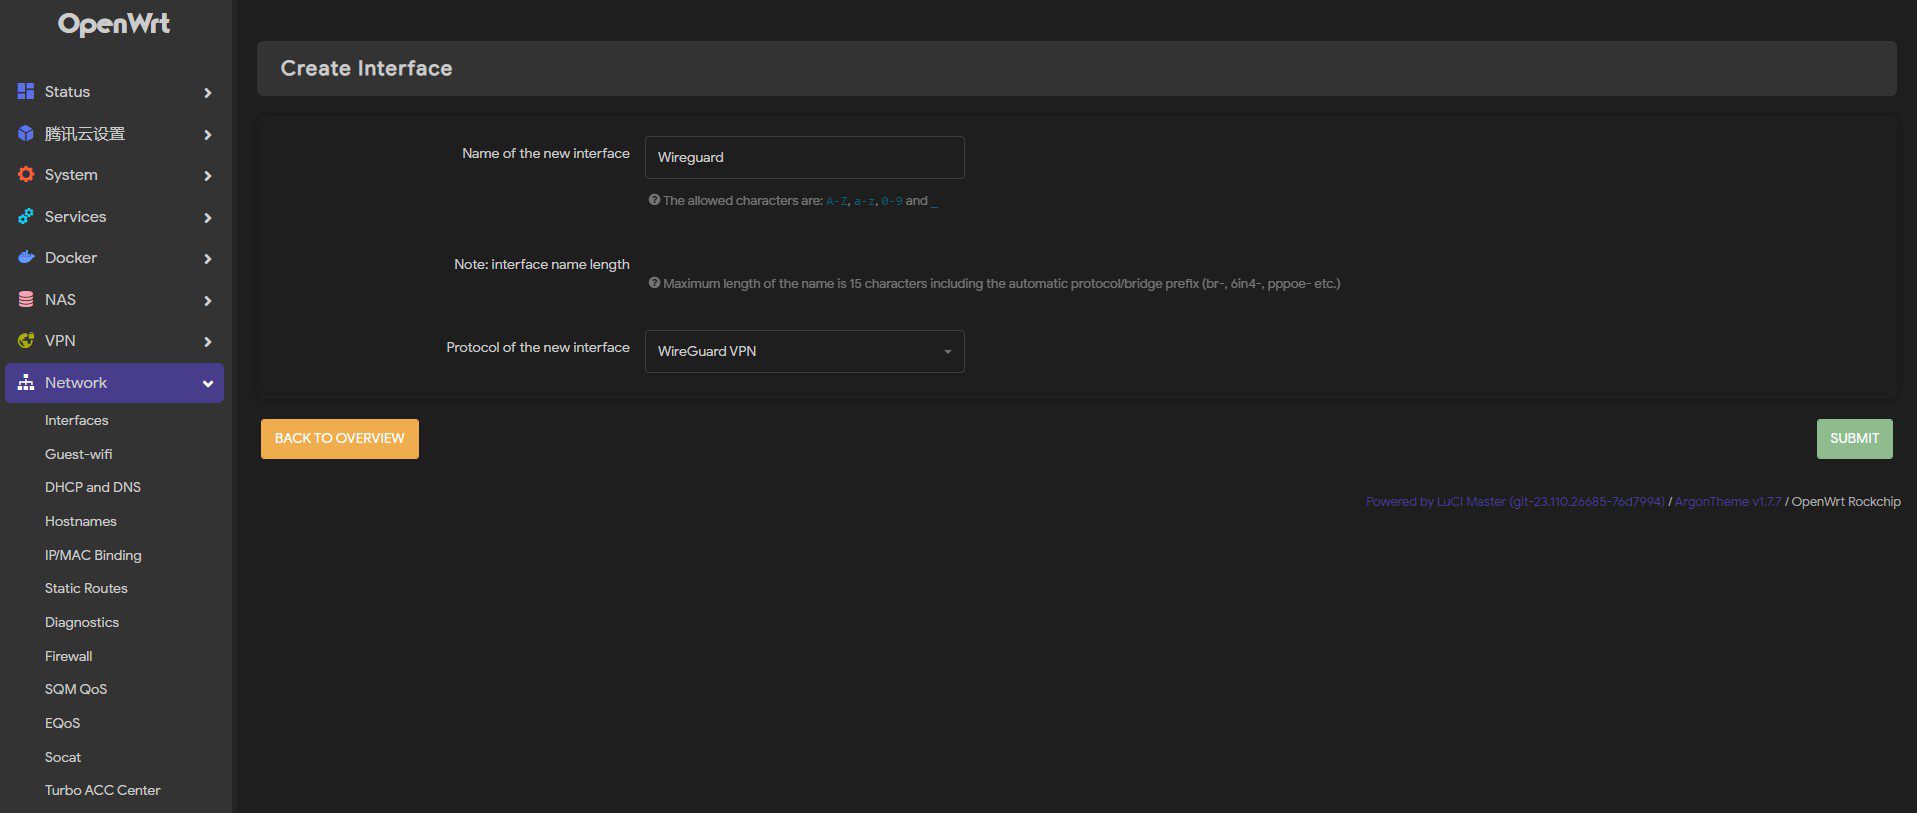
Go to OpenWRT>Network>Interfaces>Add New Interface, choose an interface name and select the WireGuard VPN protocol.
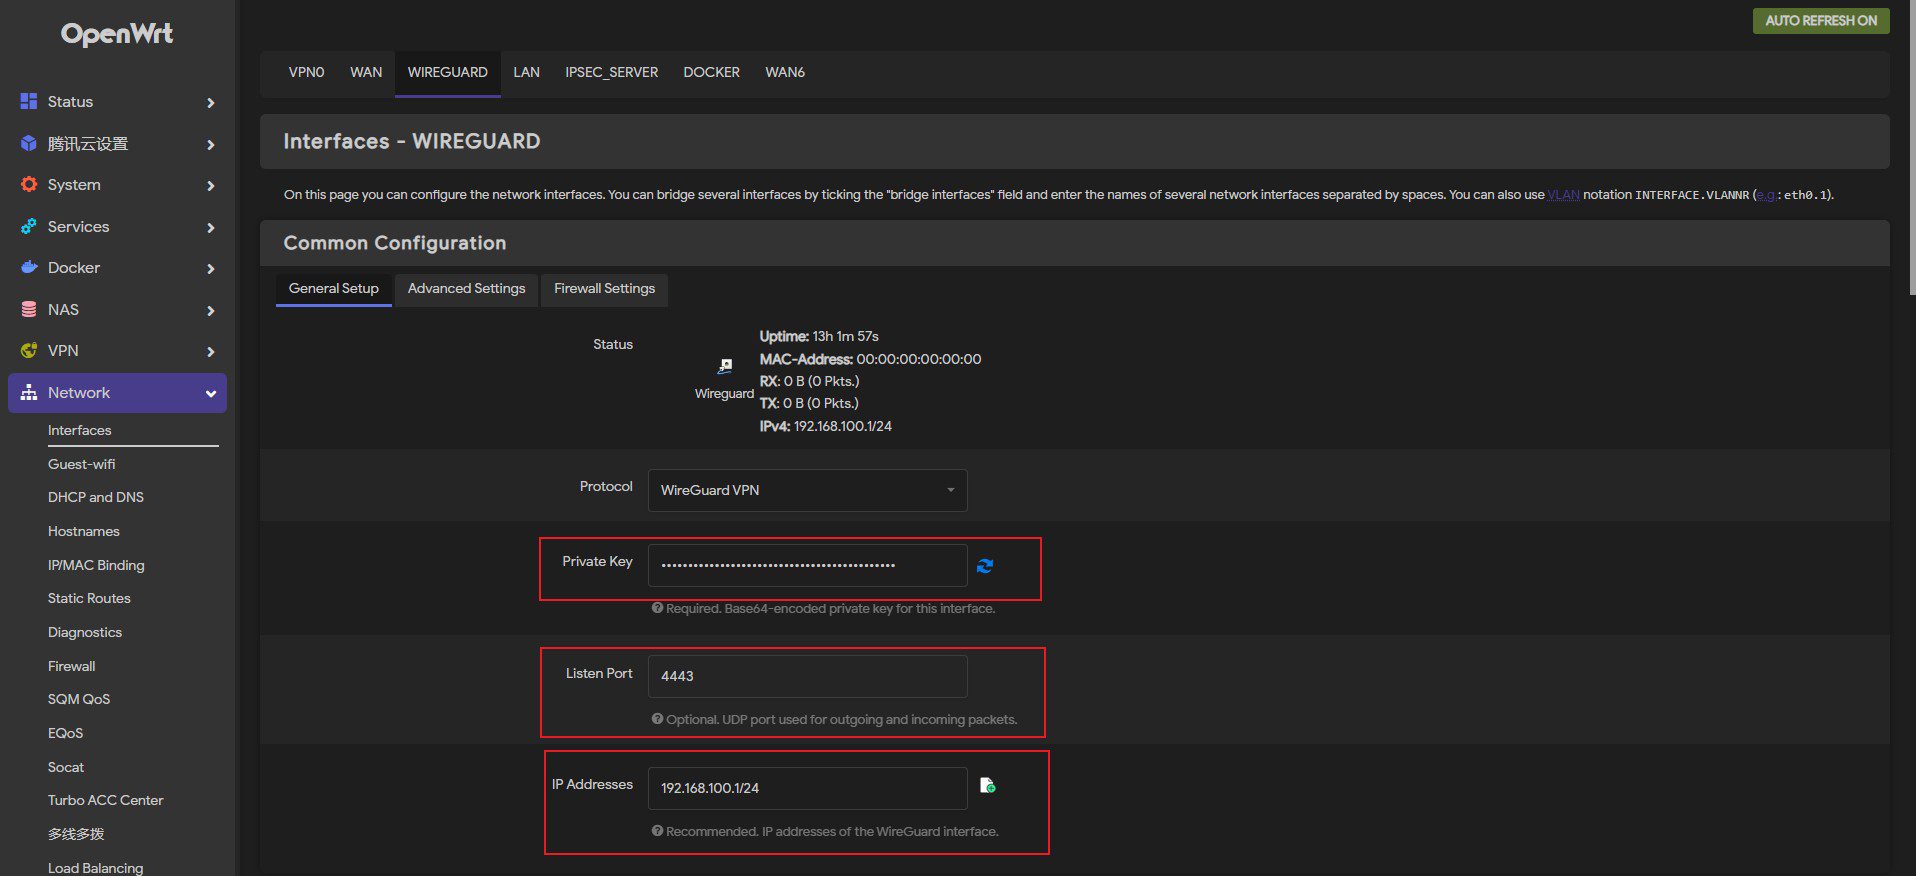
Fill in the server_private key that was just created, select a listen port (ranging from 1024 to 65535), and indicate a network segment for the nodes to route (e.g., 192.168.100.1/24).
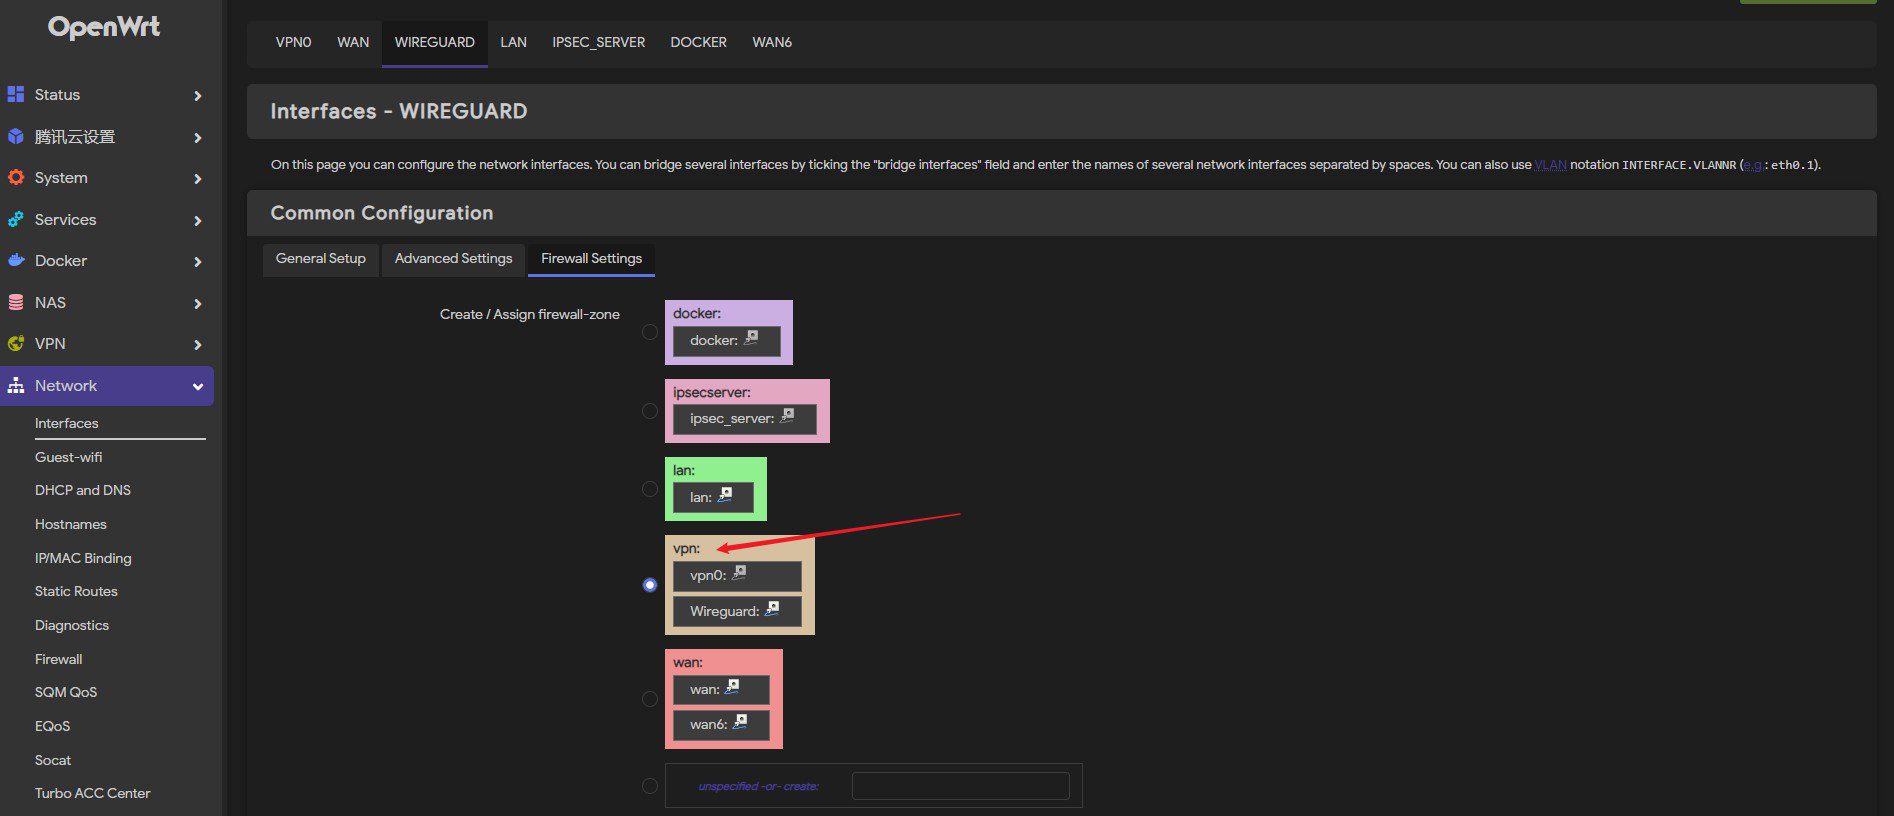
In firewall settings, make sure that the interface is assigned in the VPN zone. (Or the LAN zone if you don't have a VPN zone)
Lastly, save and apply the interface.
Firewall Settings
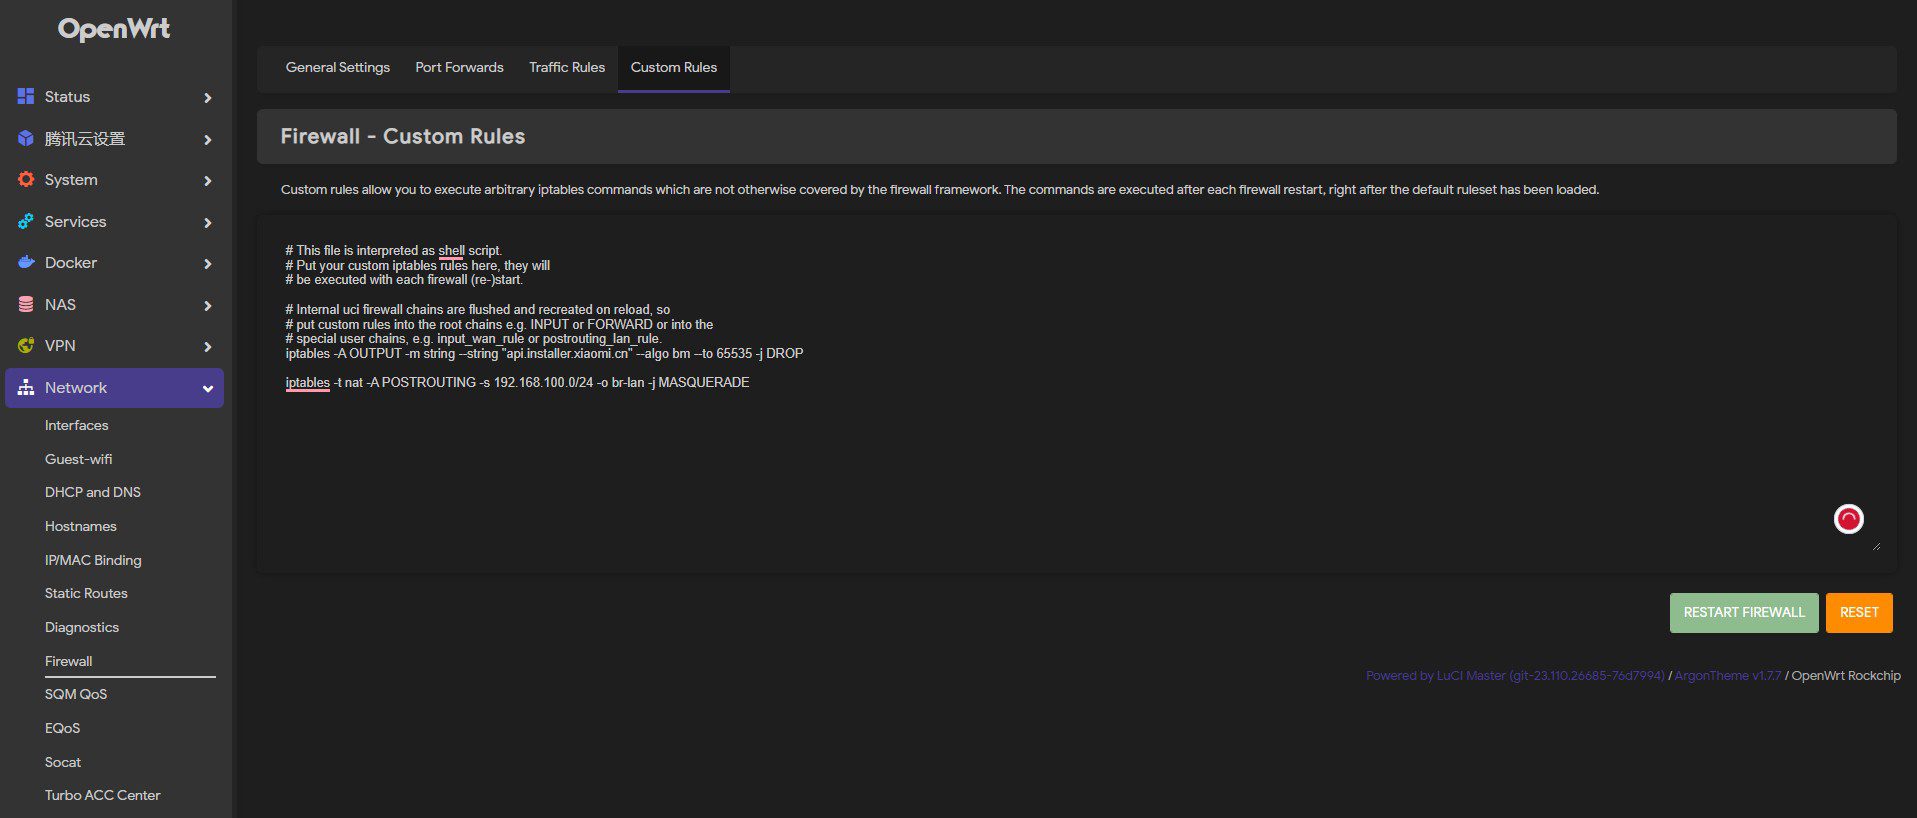
Add this line in OpenWRT>Network>Firewall>Custom Rules:
iptables -t nat -A POSTROUTING -s 192.168.100.0/24 -o br-lan -j MASQUERADE
#Edit 192.168.100.0/24 according to your custom settings, this rule allows Wireguard node to access LAN devices.
#Change "-o br-lan" to "-o eth0" if brige for LAN is disabled.
Finally, open up the ports in Firewall>Traffic Rules, and set corresponding port forwardings on your home modem if your router isn't dialling on itself.
Generate Client Keys
Run the following commands:
umask 077 #Set file permissions
cd wireguard
mkdir node_1
cd node_1
wg genpsk > sharekey #Generate a pre-shared key.
cat sharekey #Check and save the sharekey for later use
wg genkey | tee cprivatekey | wg pubkey > cpublickey #Generate keys, "cprivatekey" stands for client-privatekey and "cpublickey" means the counterpart
cat cprivatekey #Check and save the key
cat cpublickey #Check and save the key
Note that: A pre-shared key is optional and secure, but is suggested for a faster connection speed.
Configure Client Node Settings
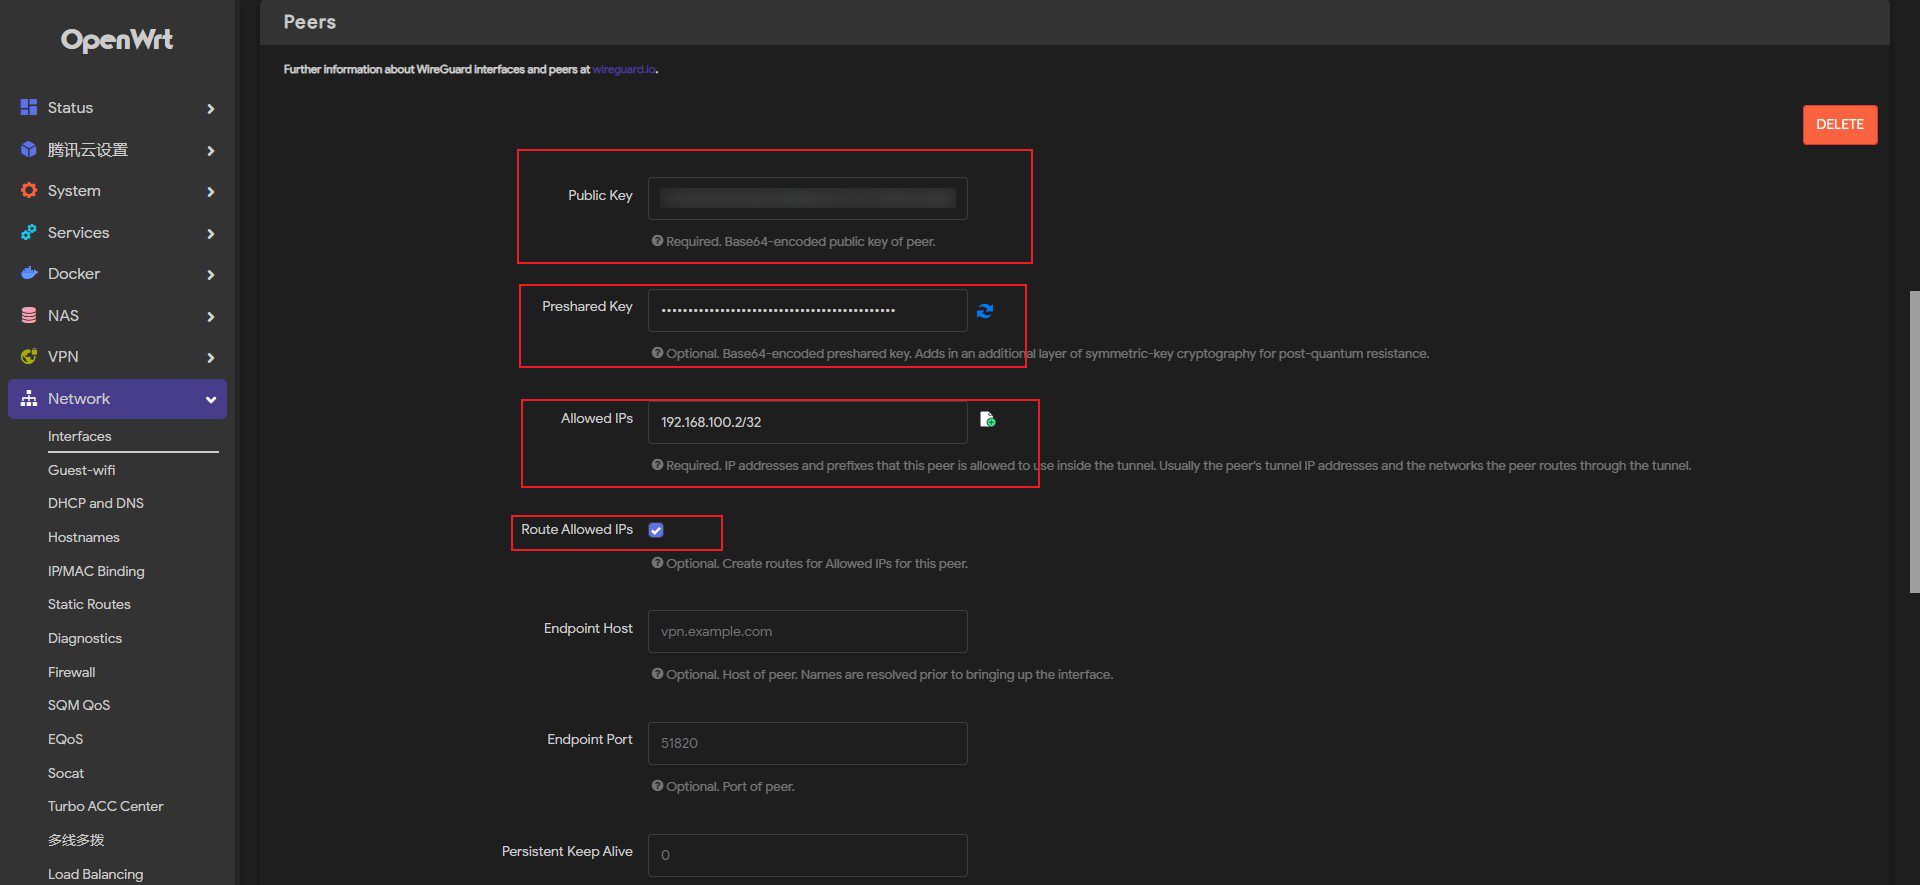
Head to [yaowan style='2']OpenWRT>Network>Interfaces>Wireguard>Edit:[/yaowan]
Fill in the client_public key and pre-shared key (check the add pre-shared key option in the bottom left corner). Indicate an IP address for the node (not conflicting with the server IP). And check the Route Allowed IPs box.
Repeat the "Generate Client Keys" and "Configure Client Node Settings" parts if you need to set up multiple client nodes.
Save and apply, restart the router for the changes to take effect.
Create a Client Configuration File
A template of a standard client configuration file is manifested below:
[Interface]
Address = 192.168.100.2 #The client IP that you defined in the Interface section
PrivateKey = cprivatekey #fill in your client_privatekey
DNS = #IP address of your router
[Peer]
PublicKey = spublickey #fill in your server_publickey
AllowedIPs = 0.0.0.0/0 #Select the allowed network segments for the client nodes to route, don't change if you have no idea about what is this
Endpoint = #Fill in your domain name, or public IP if you do not have a domain.
PersistentKeepalive = 25
#Delete all annotations when in use
Save the file as Node_1.conf
Use Configuration Files in Client Apps
Select add tunnel from files, and choose the .conf file we just created.
Click on activate and it should be working just fine.
Leave a comment if the content's somewhat helpful~
Comments | 2 comments
quas et perferendis dolorem quod quisquam inventore corporis natus. eum eos iste nulla odio repellendus et ducimus.
@34.01htt95m1nr2ags6r381svpzmn@mail4u.pw Bro Spanish Russian spammer
